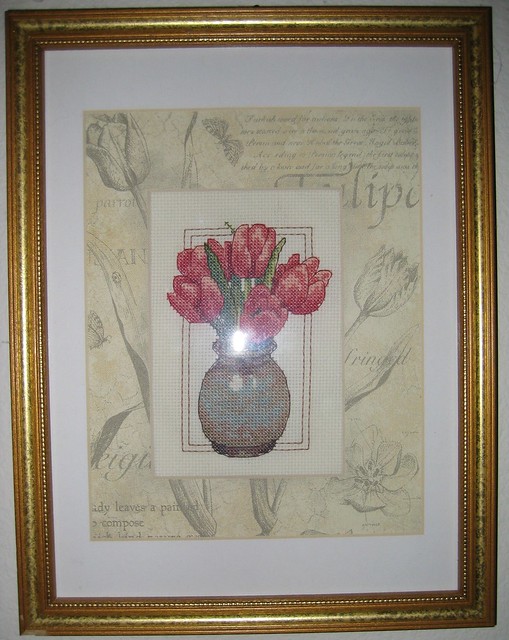
Needlework artists use needle and thread in creating their art similar to how a painter uses brush and paints. This kind of work is also often referred to as needlepoint, cross stitch or embroidery. This time-consuming art produces treasured pieces that may be passed on as family heirlooms. As with paper art, textile art needs to be protected from acid-burn which will yellow the fabric over time. It is important to always use acid-free boards and adhesives.
Properly mounting needleart requires knowing the right method for doing so to maximize protection of the work to be framed. There are readily available books on how to frame needle art. This article will cover two of the simplest methods: quick mount board and pinning. For a more detailed explanation and other needle art mounting techniques, here is recommended further reading: Needlework Framing Volume 3 by Vivian C. Kistler.
Quick Mount
The easiest method for mounting needle art is using an acid-free quick mount board. In quick mounting the edges of the needle art are attached to the back of the board with adhesive. There are some quick mount boards claiming the fabric may be lifted and re-applied indefinitely. Remember, if the adhesive becomes permanent with time, this mounting method will be irreversible, therefore your piece could be ruined if disassembled. For valuable antique needle art be wary of this method, as the results of using pressure sensitive adhesives is still questionable. Some of these boards come with batting attached to the board. Be sure the batting is heat bonded, if it is not, it may migrate and push through through the surface of the needle art causing what is called a "beard."
Pinning
Pinning is another simple method that is also reversible and includes a variety of needle art. For this you will use acid-free foam core or rag mat-board and stainless steel ballpoint pins. Ask your local art store to show you the several brands of quality mat board available. Rag board, which is made from cotton fibers, is best for fabric art. Here are the steps for the pinning method:
If the needle art is heavy, adhere two acid-free boards together with a pH neutral glue, adhesive transfer tape, or double-sided tape in order to prevent the board from warping.
Do not mount needle art on the following boards: Unsealed wood, "upson" board, masonite, corrugated cardboard, news-board, recycled boards, chipboard or sponge-covered board. These are all acidic and over time will discolor fabric that is mounted with them.
I hope this article has given you a good start to getting your needle art mounted in a way that will both showcase and protect it for many years.
Please share any additional advice in the comments below.
 |
| Flower Fairy by Stephanie Clifford (CC BY 2.0) |
Properly mounting needleart requires knowing the right method for doing so to maximize protection of the work to be framed. There are readily available books on how to frame needle art. This article will cover two of the simplest methods: quick mount board and pinning. For a more detailed explanation and other needle art mounting techniques, here is recommended further reading: Needlework Framing Volume 3 by Vivian C. Kistler.
Quick Mount
The easiest method for mounting needle art is using an acid-free quick mount board. In quick mounting the edges of the needle art are attached to the back of the board with adhesive. There are some quick mount boards claiming the fabric may be lifted and re-applied indefinitely. Remember, if the adhesive becomes permanent with time, this mounting method will be irreversible, therefore your piece could be ruined if disassembled. For valuable antique needle art be wary of this method, as the results of using pressure sensitive adhesives is still questionable. Some of these boards come with batting attached to the board. Be sure the batting is heat bonded, if it is not, it may migrate and push through through the surface of the needle art causing what is called a "beard."
Pinning
Pinning is another simple method that is also reversible and includes a variety of needle art. For this you will use acid-free foam core or rag mat-board and stainless steel ballpoint pins. Ask your local art store to show you the several brands of quality mat board available. Rag board, which is made from cotton fibers, is best for fabric art. Here are the steps for the pinning method:
- Cut board to a half inch larger on each side than the mat window.
- Locate the center of each side. Start at the top and stick a pin through the fabric into the edge of the foam core or rag board. Leave the pin sticking out.
- Stretch the needle art towards the bottom side and pin.
- Working from the center to the corners to tighten and keep the grain of the fabric straight (or the design, if the grain and design differ.)
- Pin the other two sides.
- When the needle art is stretched and straight, push pins all the way into the foam-core or rag board.
- Pull any loose corner fabric on the back towards the center of the board and pin at an angle, taking care not to go through to the front. (Do not use staples because they may cause tears and cuts in the threads of the fabric.)
If the needle art is heavy, adhere two acid-free boards together with a pH neutral glue, adhesive transfer tape, or double-sided tape in order to prevent the board from warping.
Do not mount needle art on the following boards: Unsealed wood, "upson" board, masonite, corrugated cardboard, news-board, recycled boards, chipboard or sponge-covered board. These are all acidic and over time will discolor fabric that is mounted with them.
 |
| Red Tulip Botanical by Stephanie Clifford (CC BY 2.0) |
Please share any additional advice in the comments below.


.png)


0 comments: