This article will expand on mounting options for paper
artwork beyond the method using paper hinges.
If you wish to mat and frame artwork for museum-quality, with the option
to change it at a later date the mounting job must be reversible. Here I will go over some methods that are
reversible. The following information on Corner Pockets, Mounting Strips, and
Sink Mounts are the preferred archival mounting methods.
 |
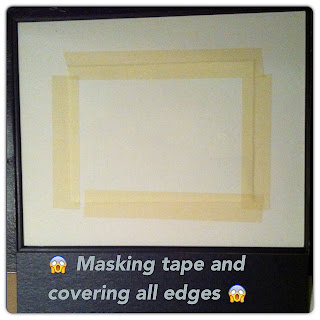
| Example of an undesirable yet common mounting practice. |
An option to using hinges is applying acid-free linen tape to attach the cut mat to the mounting board. When trying to choose tape look for one that says Framer’s Tape on the label. This is a strong cloth tape with a tactile nature similar to that of duct tape and was developed for pH neutral mounting, matting, and heavy frame work. As long as it is good quality is will not be predisposed to yellowing or cracking. This type of tape can be torn by hand in one direction; no knives or scissors needed. This tape is compatible with paper, board, and most porous surfaces. It's pliable, and is ideal for use.
Unless you already have premade matting ready to go your first
step will be to build your matting by starting with acid-free 4-ply matboard used
as the mounting board; 2-ply is too thin and is prone to warping. This kind of matboard
is also referred to as museum mounting board. Keep in mind that what touches artwork should
be acid-free for the sake of preservation. For photographs, always use
photographic mounting boards.
The mat and the mount board should be of equal size. Lay the cut mat face down and the mounting board face-up with their top edges together. Make sure the tape is approximately an inch shorter than the mat's edge, and lay the tape along the seam created by the top edges of the two boards touching. Close the mat, and examine alignment at the corners.
Have something weighing down the artwork that will not damage it so that the artwork will stay in place. Open the mat and mark on the mount board the position of all four corners of the artwork. Now that you have your mat it is time to decide which of the following techniques is appropriate for the artwork you are mounting.
Corner Pockets are made by bending a strip of acid-free paper to form a triangular pocket. Corner pockets are also available ready-made in a variety of sizes. Tape the pocket to the mounting board with acid-free linen tape. Slip the corners of the artwork into the four pockets.
Mounting Strips are made of 100% rag or mylar and hold the artwork in place from the sides, top and bottom instead of the corners. Half of the strip is backed with an adhesive to attach to the mounting board. The artwork is slipped into the inner grooves on the side of the non-adhesive strip half. You must measure very carefully to have a close fit for securing the art properly for display.
Corner pockets and mounting strips require no attachment to the artwork, as no adhesive makes contact with the artwork. When implementing these methods remember to allow 1/16" to 1/8" breathing room for contraction and expansion of your artwork. These methods are effective options to T-hinges if the artwork is small enough and stiff enough not to slip out of them. Also, the artwork must be overmatted to hide the corners and strips.
Sink Mounts are used for artwork on thick supports, e.g. illustration board. The sink mount is a board of equal thickness to the artwork. Cut the center out of the sink mount board the same size as the artwork. For the backing, attach matboard behind the sink mount with double-sided tape or ATG tape. Place the artwork in the sink mount opening. The artwork in the sink mount is sandwiched between the backing and the window mat.
The mat and the mount board should be of equal size. Lay the cut mat face down and the mounting board face-up with their top edges together. Make sure the tape is approximately an inch shorter than the mat's edge, and lay the tape along the seam created by the top edges of the two boards touching. Close the mat, and examine alignment at the corners.
Next you place the artwork to be mounted on the mounting board. Make certain you do not attach it to the cut mat. Close the tape-hinged mat and position the artwork precisely as you want it within the mat window.
Make sure the item weighing down the art is harmless.
|
Have something weighing down the artwork that will not damage it so that the artwork will stay in place. Open the mat and mark on the mount board the position of all four corners of the artwork. Now that you have your mat it is time to decide which of the following techniques is appropriate for the artwork you are mounting.
 |
| Draw a grid around the actual art or a reference object of the same dimensions. |
Corner Pockets are made by bending a strip of acid-free paper to form a triangular pocket. Corner pockets are also available ready-made in a variety of sizes. Tape the pocket to the mounting board with acid-free linen tape. Slip the corners of the artwork into the four pockets.
Mounting Strips are made of 100% rag or mylar and hold the artwork in place from the sides, top and bottom instead of the corners. Half of the strip is backed with an adhesive to attach to the mounting board. The artwork is slipped into the inner grooves on the side of the non-adhesive strip half. You must measure very carefully to have a close fit for securing the art properly for display.
Corner pockets and mounting strips require no attachment to the artwork, as no adhesive makes contact with the artwork. When implementing these methods remember to allow 1/16" to 1/8" breathing room for contraction and expansion of your artwork. These methods are effective options to T-hinges if the artwork is small enough and stiff enough not to slip out of them. Also, the artwork must be overmatted to hide the corners and strips.
Sink Mounts are used for artwork on thick supports, e.g. illustration board. The sink mount is a board of equal thickness to the artwork. Cut the center out of the sink mount board the same size as the artwork. For the backing, attach matboard behind the sink mount with double-sided tape or ATG tape. Place the artwork in the sink mount opening. The artwork in the sink mount is sandwiched between the backing and the window mat.
You may want to ask a local art store framer to show you their mounting materials and supplies so they can answer questions about the specific materials they have that best suit the project. For more mounting information and methods see Matting Art – What Matters and Why.
© Rebecca H Knight, images © their respective owners. All rights reserved.


0 comments: